Garage doors are an important part of any home, as they assure security and convenience. Just like any other mechanical device, some problems may develop with time; some basic knowledge of how to repair these issues will help save some precious time and unwarranted expenditure. This article covers the top five DIY garage door repairs every homeowner should know.
Fixing a Noisy Garage Door
Tighten Loose Hardware: Using a wrench, tighten all bolts and screws rattling on the door and track. All of these can come loose over time under the continuous movement of the door.
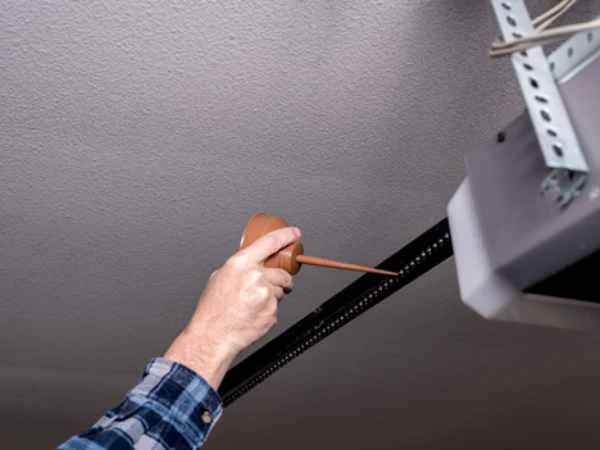
Lubricate Moving Parts: Good lubrication for garage doors will be applied to rollers, hinges, and tracks. Do not use WD-40, this attracts dust and dirt.
Replace Worn Rollers: Along with the worn-out or damaged rollers, you should replace them. Nylon rollers are quieter compared to metal rollers and require less maintenance.
By following these steps, the noise created by your garage door will be reduced to an extent or even eliminated; As advised by the professionals at Canadian garage door repair North Vancouver, with more complex issues like problems with the opener, it might be wise to follow up with professionals.
Replacing Garage Door Springs
Garage door springs are very tight and dangerous; therefore, a lot of care must be taken to replace them. There are two common types of springs used; these include the torsion, which is mounted above the door, and the extension type, which usually is located on either side of the door. Here is how one must safely replace them:
Gather the Right Tools: You will require winding bars, a wrench set, and a ladder that is sturdy enough. Besides proper functioning, having the right tool will also ensure your safety.
Release Tension: Use winding bars to gradually release the tension for torsion springs. In the case of extension springs, start by removing safety cables.
Replacing the Springs: Carefully remove old springs and replace them with new ones of the perfect size and type for your door.
Reapply Tension: Again, follow the manufacturer’s instructions for how to apply tension to the new springs installed; the proper functioning of the door is very closely related to this step.
Doing garage door spring replacements often proves dangerous. If you do not trust your skills, it is advisable to get professional help to avoid injuring yourself.
Realigning Garage Door Sensors
Garage door sensors are critical for safety. They ensure the door does not close on a person or any other object. If your garage door doesn’t close in the way it is expected to, possibly the sensors have been misaligned. Here is a step-by-step process for correcting this common situation:
Obstruction Check: Ensure no obstructions get in the way of your sensors, including dirt and debris; clean with a soft cloth to remove any dirt.
Alignment of Sensors: The sensors must ‘look’ directly at each other. Loosen the screws that hold the sensors, shift them into position, and retighten the screws to lock them in.
Test the Door: After the sensors have been realigned, try to close the garage door; if it does not make a difference, there might be a problem with the wiring or maybe the sensor itself.
The problem of sensor misalignment is very common and usually takes only a few minutes to be resolved; however, if the problem persists, it might be necessary for you to replace them with others or consult a professional.
Fixing a Garage Door That Won’t Open
A garage door that refuses to open can be frustrating. There might be quite many reasons behind this, including those easy to solve.
Check the Remote Batteries: Many times, this problem is as simple as dead batteries in the remote; replace them and see if you get any change.
Check Opener: If the opener fails, check if there is power going to it and if it has a plug; sometimes, the opener needs a reset by unplugging it for a few seconds and then plugging it back.
Look for the Springs: In case they are broken, avoid the risk of trying to open the door manually; if in doubt that it’s not open because of broken springs, immediately call in the experts without even trying to open it manually.
Replacing Weather Seals
Weather seals do a good job blocking out drafts, water, and even pests and also help maintain energy efficiency within your garage. However, this seal will wear out or get damaged over time allowing the above-mentioned things to invade your garage space.
Purchase the Right Seals: Measure your garage door space so that you get the right size and type of weather seals.
Removal of the Old Seals: Pull off old seals, clean the surface with a mild detergent, and scrub off any dirt and debris.
Installing the New Seals: Fit the new seals from one end to another; make sure that they are in place without moving and hold tight on the door and floor.
It’s quite easy to give your garage a bit of added insulation without much hassle, by replacing weather seals that work as barriers against the elements. In conclusion, knowing some basic garage door repairs will go a long way to save time and money for most homeowners. Lubricating the moving parts or realigning sensors is pretty easy, but the replacement of springs is quite dangerous and requires great precaution. First and foremost, the safety aspect should be uppermost in your mind, and never feel bad asking for professional advice when the need arises. Master these five DIY fixes to keep your garage door running smoothly and efficiently for years to come.


